Hi Everyone,
In this video We will learn how to create setup multi node kubernetes cluster in your our local machine
Here I have taken 2 ubuntu machines for kubernetes cluster setup demo.
In this video We will learn how to create setup multi node kubernetes cluster in your our local machine
Here I have taken 2 ubuntu machines for kubernetes cluster setup demo.
In the both machine I installed Docker, Kubeadm, Kubelet, Kubectl
Then I made one machine as a kubernetes master and other one for as node.
Download Vagrant and VirtualBox Softwares :
vagrant installation:
check for powershell version using the below command
$PSVersionTable.PSVersion OR get-host
if your powershell version is less than 3 then you have to upgrade your powershell first then install
https://www.microsoft.com/en-us/download/details.aspx?id=54616
3. Download Scripts from Kubernetes-Files [or you can follow the below steps]
Step1 :
Create an folder (Ex: kubernets-prac ) inside that create an file with name Vagrantfile
paste the below content...[It will download and create 2 VMs in virtual box]
#Vagrant File Content:
Vagrant.configure("2") do |config|
config.vm.boot_timeout = 500
config.vm.define "k8smaster" do |k8smaster|
k8smaster.vm.box = "bento/ubuntu-16.04"
k8smaster.vm.network "private_network", ip: "192.167.10.70"
k8smaster.vm.hostname = "k8smaster"
k8smaster.vm.provider "virtualbox" do |vb|
vb.memory = "2048"
vb.name = "k8smaster"
vb.cpus = 2
vb.customize ["modifyvm", :id, "--cableconnected1", "on"]
end
k8smaster.vm.provision "shell", inline: <<-SHELL
sudo swapoff -a
sudo echo "192.167.10.70 k8smaster" >> /etc/hosts
sudo echo "192.167.10.71 k8snode1" >> /etc/hosts
SHELL
end
config.vm.define "k8snode1" do |k8snode1|
k8snode1.vm.box = "bento/ubuntu-16.04"
k8snode1.vm.network "private_network", ip: "192.167.10.71"
k8snode1.vm.hostname = "k8snode1"
k8snode1.vm.provider "virtualbox" do |vb|
vb.memory = "2048"
vb.name = "k8snode1"
vb.cpus = 2
vb.customize ["modifyvm", :id, "--cableconnected1", "on"]
end
k8snode1.vm.provision "shell", inline: <<-SHELL
sudo swapoff -a
sudo echo "192.167.10.70 k8smaster" >> /etc/hosts
sudo echo "192.167.10.71 k8snode1" >> /etc/hosts
SHELL
end
end
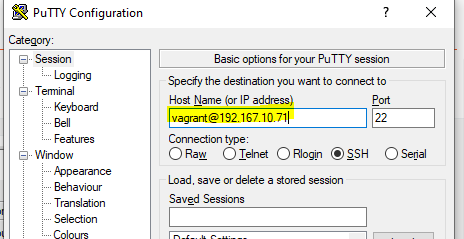
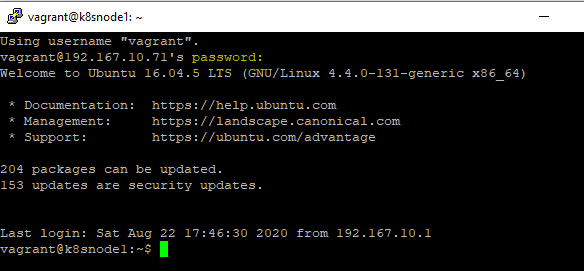
Step2 : Login into those machines
Master1 :
Node1:
Username : vagrant
Password : vagrant
Step 3: Copy and install the below script in both machines
#kube-installation.sh File Content:
#!/bin/bash
echo "installing docker"
apt-get update
apt-get install -y \
apt-transport-https \
ca-certificates \
curl \
software-properties-common
curl -fsSL https://download.docker.com/linux/ubuntu/gpg | apt-key add -
add-apt-repository \
"deb https://download.docker.com/linux/$(. /etc/os-release; echo "$ID") \
$(lsb_release -cs) \
stable"
apt-get update && apt-get install -y docker-ce=$(apt-cache madison docker-ce | grep 17.03 | head -1 | awk '{print $3}')
echo "installing kubeadm and kubectl"
apt-get update && apt-get install -y apt-transport-https
curl -s https://packages.cloud.google.com/apt/doc/apt-key.gpg | apt-key add -
cat <<EOF >/etc/apt/sources.list.d/kubernetes.list
deb http://apt.kubernetes.io/ kubernetes-xenial main
EOF
apt-get update
apt-get install -y kubelet kubeadm kubectl
#chmod +x kube-installation.sh
# sudo sh kube-installation.sh
Step 4:
Now we have to make one vm as master other one as node
Execute the below commands in master node
kubeadm init --pod-network-cidr=192.168.0.0/16 --apiserver-advertise-address=192.167.10.70
you will get join token like this, you have to execute this command in the node1
after you execute the above command in the node1, then you have to execute the below commands in the master node
# Here you have 2 option , either you can run in root user or
# If you want use kubernetes in regular user you have to execute these below # commented lines
# To start using your cluster, you need to run the following as a regular user:
# mkdir -p $HOME/.kube
# sudo cp -i /etc/kubernetes/admin.conf $HOME/.kube/config
# sudo chown $(id -u):$(id -g) $HOME/.kube/config
# kubectl apply -f https://docs.projectcalico.org/manifests/canal.yaml
# or execute the below 2 commands
export KUBECONFIG=/etc/kubernetes/admin.conf
kubectl apply -f https://docs.projectcalico.org/manifests/canal.yaml
Now check nodes status using kubectl get nodes command in the master node:
if you get status is ready then your good to go start with kubernetes..
Watch Video completely then try ..
Thanks,
Tharun.K
For more interesting videos subscribe to my channel : Click Here


1 Comments
Hi Tarun,
ReplyDeletekubernete start purpose your given 2 commands, i tried same way but unable to master and node ready state.
kubectl apply -f https://docs.projectcalico.org/v3.1/getting-started/kubernetes/installation/hosted/canal/rbac.yaml
kubectl apply -f https://docs.projectcalico.org/v3.1/getting-started/kubernetes/installation/hosted/canal/canal.yaml
I am getting below error:
error: unable to recognize "https://docs.projectcalico.org/v3.1/getting-started/kubernetes/installation/hosted/canal/canal.yaml": no matches for kind "DaemonSet" in version "extensions/v1beta1"